
Step 4: Process your raw data
Click “Step 1: Process data” on the main Multi-Pass-Merger interface. This window will pop up:
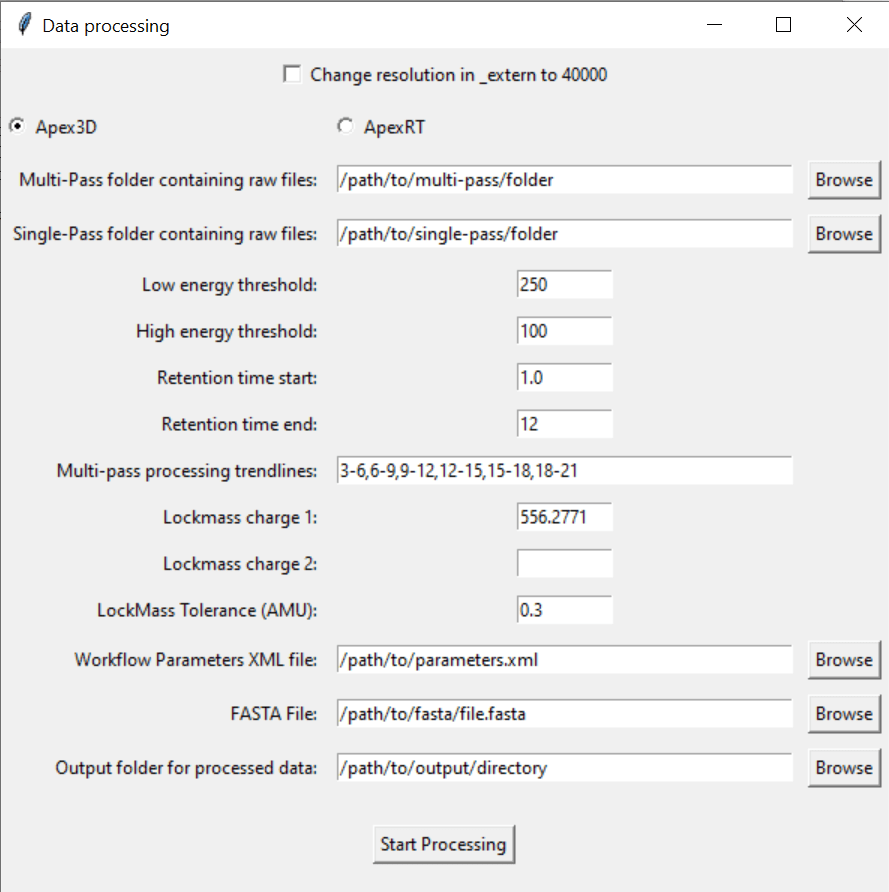
4.1: Select the paths to the folders that contain all of your .raw multi-pass or single-pass files.
For best performance, ensure ALL FILES (.raw files, .xlm files, FASTA files etc…) are stored locally on your computer

If you leave one empty, Multi-Pass-Merger will only process the data for which you did specify a folder!
4.2. Select the processing parameters you want.
The software comes pre-filled out with suggested values.
INFO: What do the processing parameters mean?
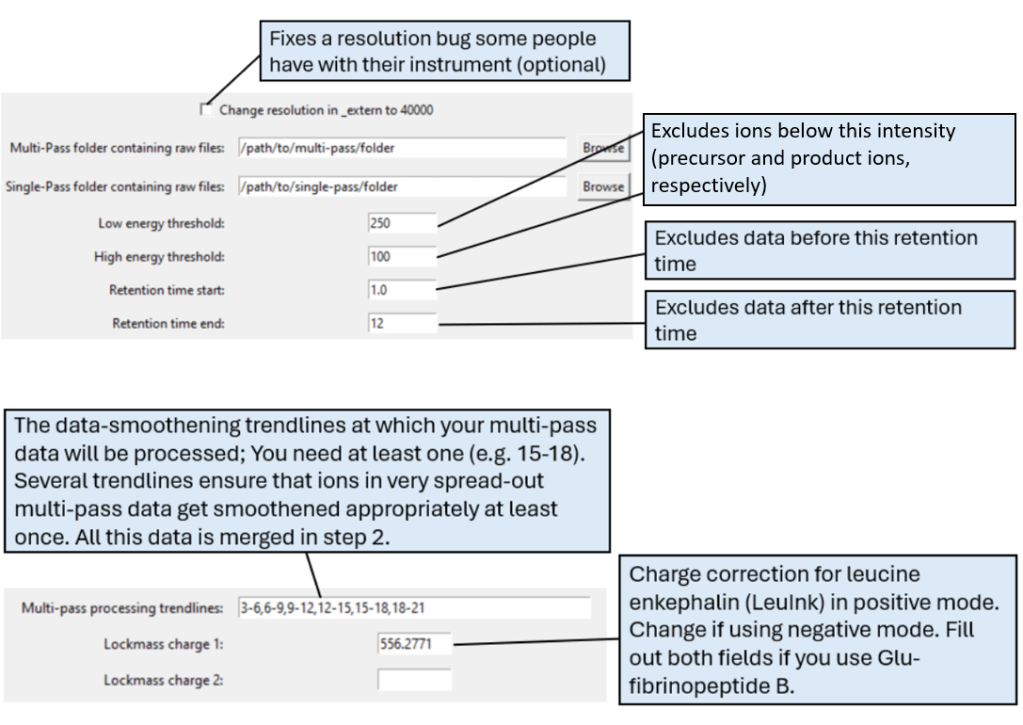
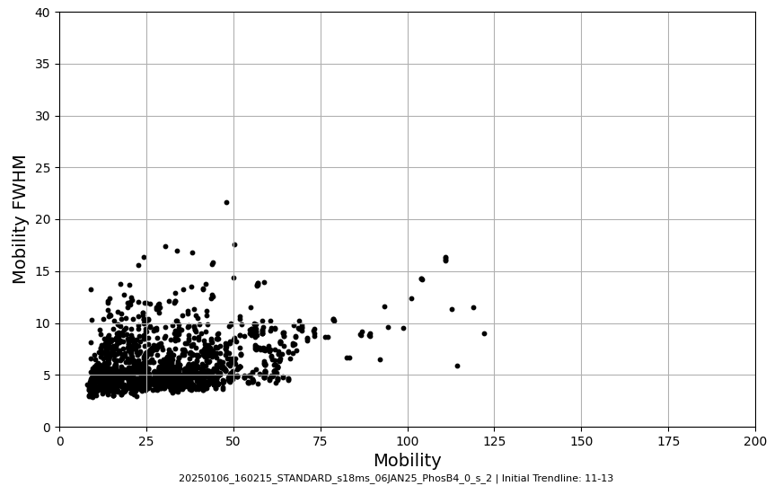
INFO: What trendlines should I choose?
For membrane proteins and similarly sized proteins, the pre-filled out trendlines will likely work well.
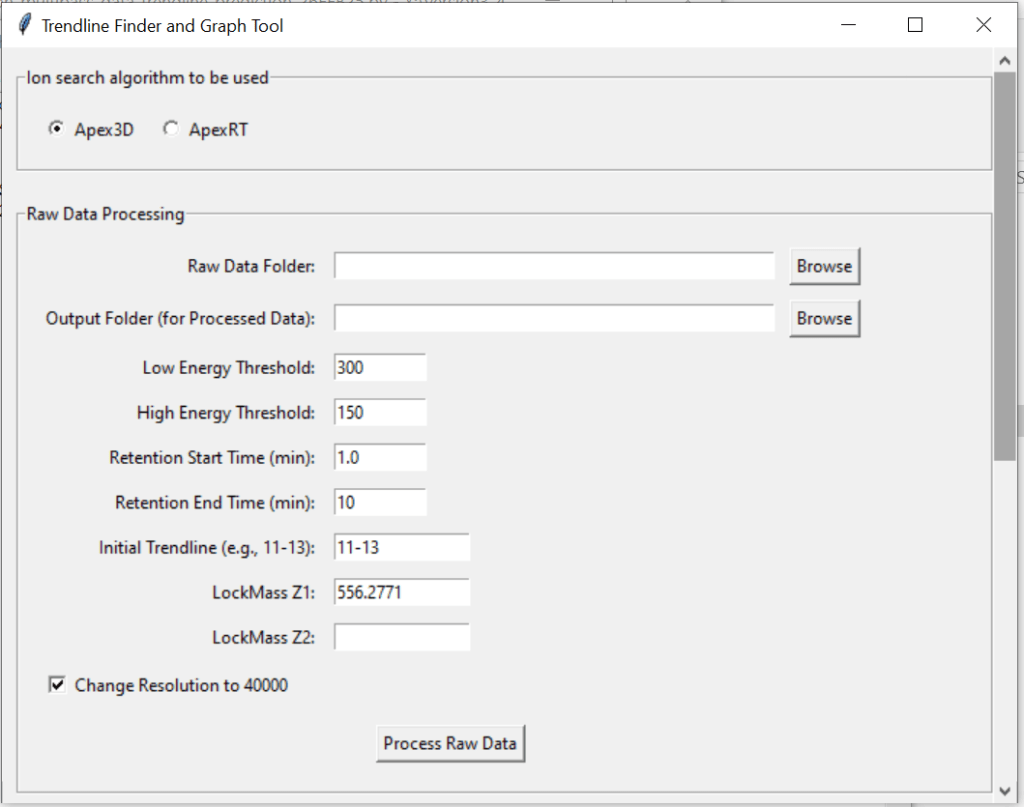
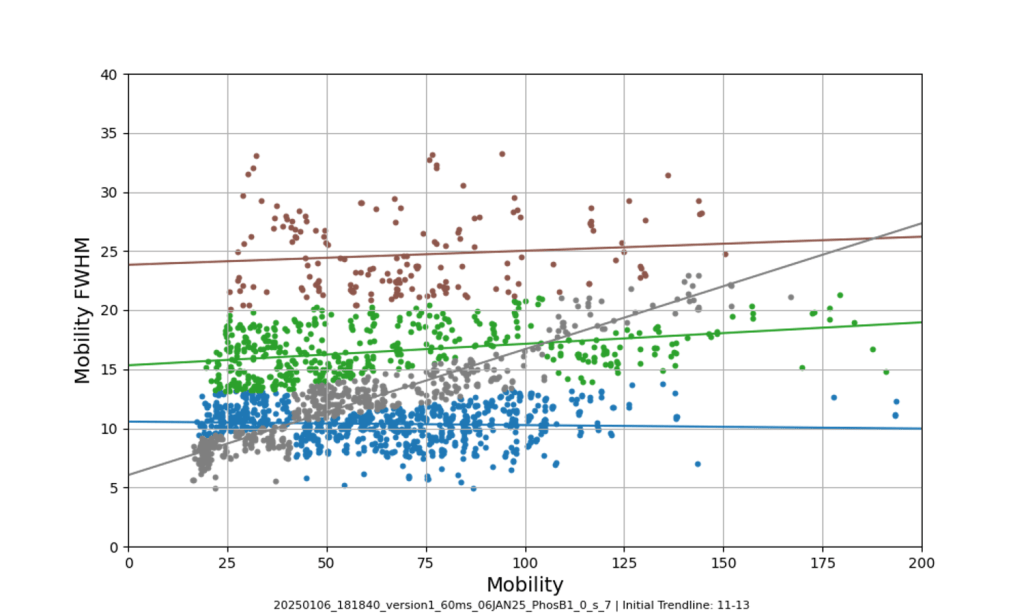
Otherwise, you can use the Trendline Visualizer to get a range of trendlines for your data specifically.
Access this tool through the main MultiPassMerger interface, and select a folder that contains the .raw files for which you want to plot a mobility vs. mobility FWHM graph with trendlines. Apex3D64.exe (PLGS) (or ApexRT.exe, if available to you) will ID the ions in the raw. files. Once finished, scroll down and select the resulting folder as the “Processed Data Folder” and select a output folder where you want your graphs to go. Now, the 2000 most intense ions will get plotted. You can generate graphs with or without trendlines, in random colours, user specific colours, or with colours for each trendline cluster. Choose to save trendlines in a notepad file if so desired.


4.3. Select a FASTA file containing your protein sequence

INFO: Example FASTA file
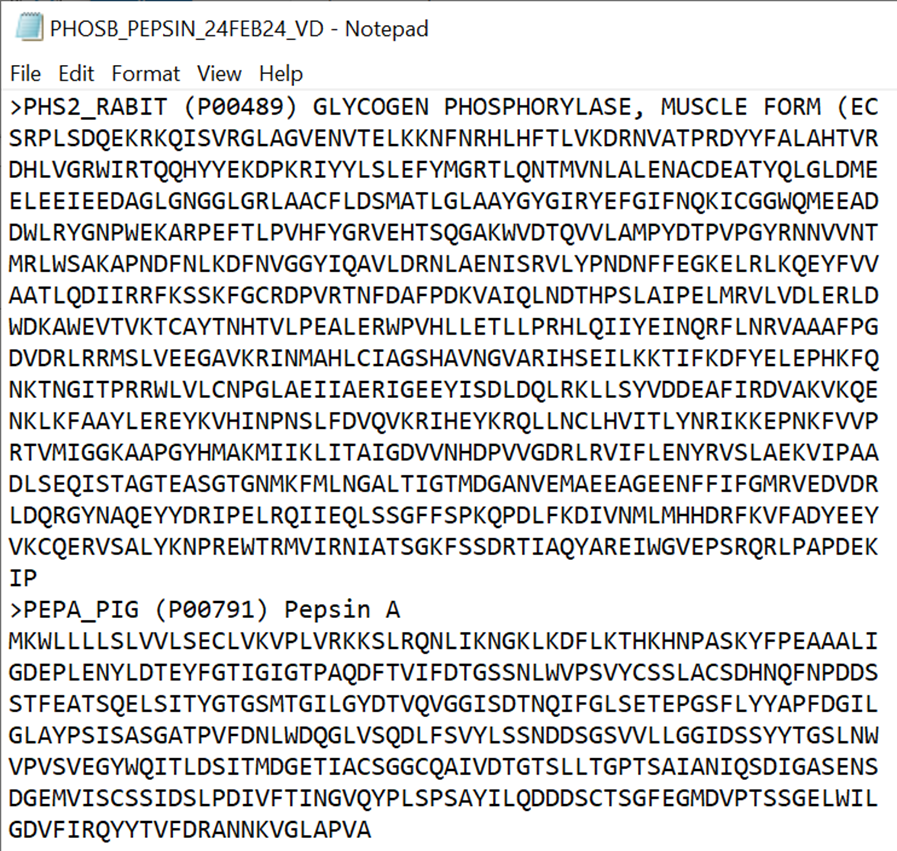
Add your protein sequence, and the sequences of any contaminants you expect to see (Here: PEPA_PIG, which is pepsin from the pepsin column digestion. PHS2_RABIT is our target protein)
You can download the FASTA sequences of many proteins via UniProt
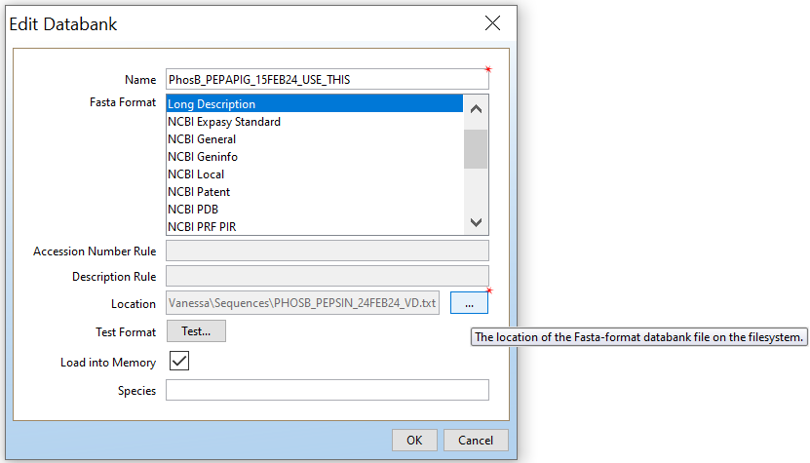
INFO: How to add your FASTA file in the PLGS library
In order to make workflow parameters in PLGS (see step 4.4) you need to add your FASTA file to the PLGS libary:
Open PLGS, Libraries, Protein Sequence Databanks and then click on “New..”. Give your protein sequence databank a name, choose “Long Description”, and then the location of the FASTA file you want.
If you want to test it, click “Test…”.
Done.


4.4. Select your .xml workflow processing parameters file, exported from ProteinLynx Global Server

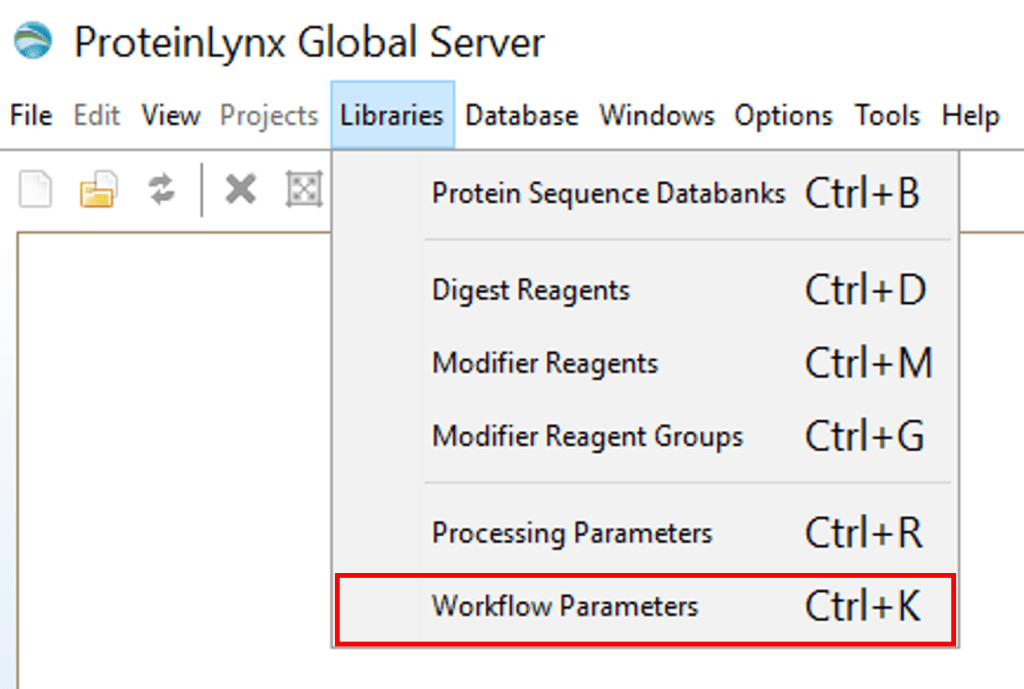
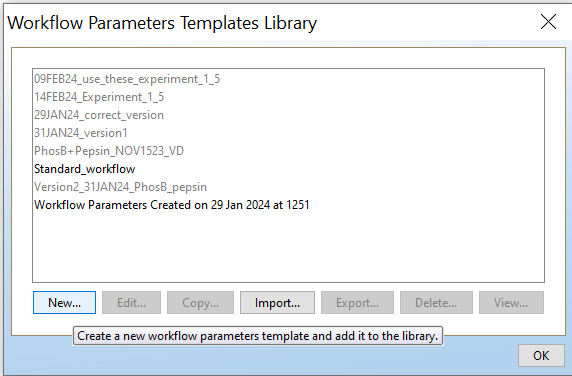
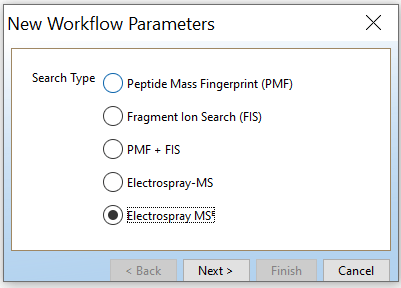
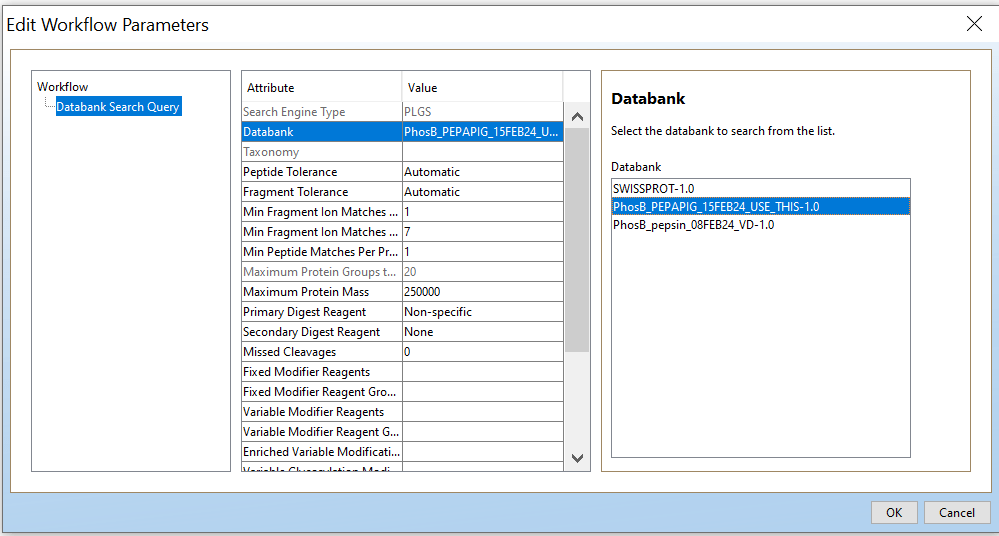
INFO: How to make workflow parameters in PLGS
Luckily, you will only have to do this once for your protein:
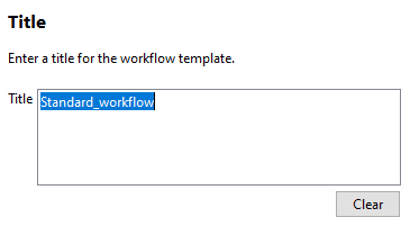
Open PLGS, Libraries, Workflow parameters, New…, Electrospray MSE, Select your FASTA file that you have uploaded in PLGS earlier (See section 4.3), Fill out the other parameters (if you are unsure, copy the ones you see in these screenshots) and lastly, give your parameters a name.

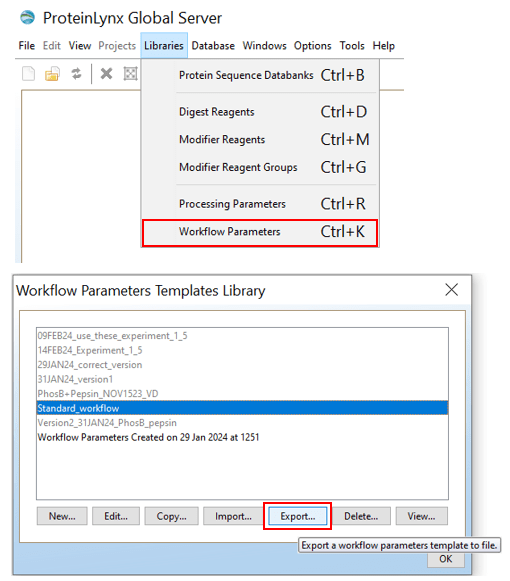
INFO: How to export workflow parameters from PLGS
Export your PLGS workflow parameters as follows:
Then save the resulting .xml file
4.5. Make a new folder
Name it something unique (to prevent over-writing) and choose it as your output folder:


4.5. Click “Start Processing”.
When it is done, the black command prompt window will close itself.
INFO: How long does processing take?
Processing will take a few hours (2-16h in some of our tests). To make it faster, you can:
- Process less samples
- Choose less multi-pass trendlines (e.g. 3 instead of 5; this will only make your data slightly worse)
- Use a better computer
- Restrict the retention time window as much as possible
- Use higher energy thresholds in the processing parameters (careful! this could make your data significantly worse)
