
Step 5: Merge and filter your data
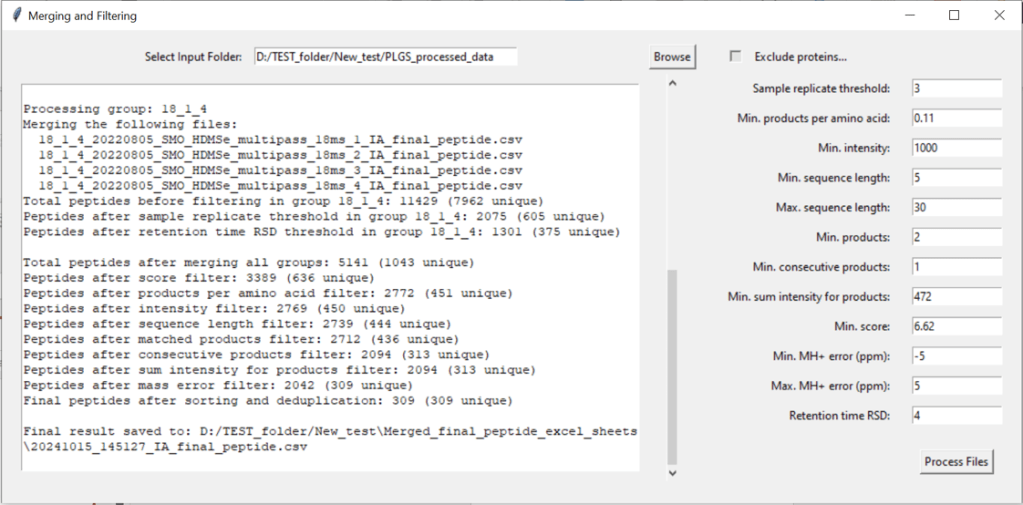
Click “Step 2: Merge and Filter data” on the main Multi-Pass Merger interface. This will open the following window:
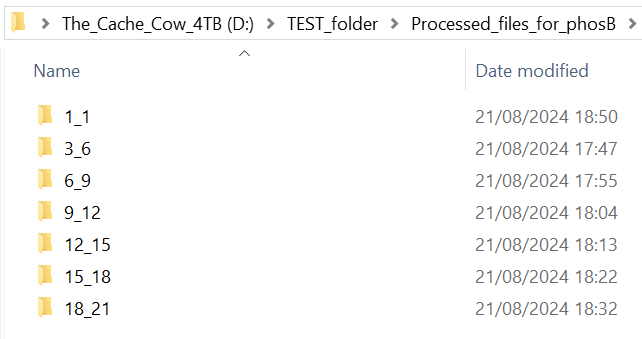
5.1. Select your input folder.
This should be the output folder you made in section 5.5.

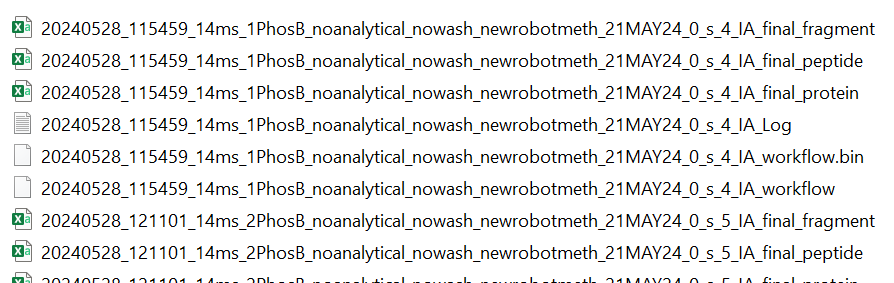
It will contain your processed IA_final_peptide data, sorted in sub-folders to differentiate between single-pass (always called 1_1) and multi-pass data (named according to the trendline used for processing, e.g. 3_6, 6_9, 9_12 etc…)
INFO: Example input folder
5.2. Select the samples you want to merge, ensure that replicates have matching numbers in the white entry fields, and that they are correctly identified as single pass (SP) or MultiPass (MP).
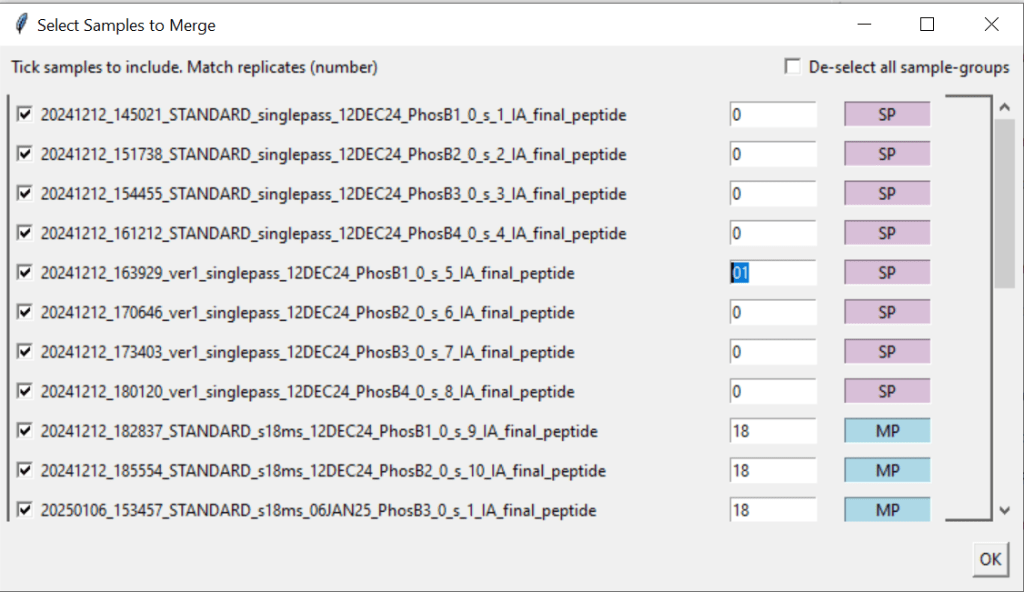
Hint: In this example, we have 4 replicates each. The user has to manually change the numbers of the “ver1_singlepass_12DEC24” samples from 0 to something else (here: 01) to ensure that all samples are grouped together correctly.
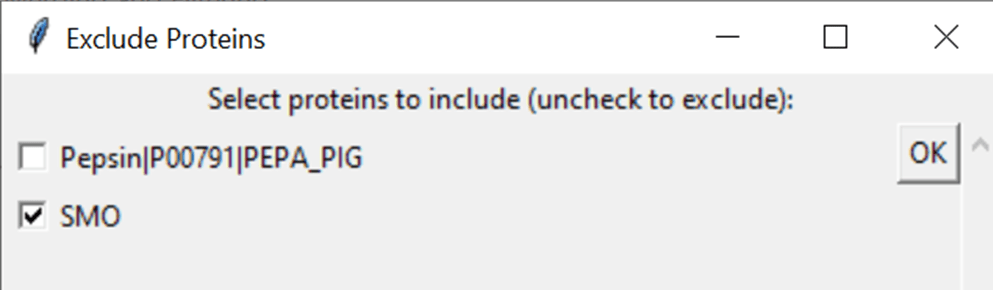
5.3. Choose proteins to exclude
If you want to exclude proteins from your data (e.g. Pepsin or a contaminant), tick “Exclude proteins…” in the right upper corner. This will scan all files in the input folder and then list the proteins it found in a new pop-up window. If you exclude a protein, the data associated to it is excluded from further processing.
5.4. Choose a sample replicate threshold & filtering parameters.
How to pick a sample replicate threshold
n-1 (one less than the number of your sample replicates) if you have at least 4. Otherwise, n. If a peptide appears less times than this number across your sample replicates, it will be deleted. If you choose 0 or 1, the relative standard deviation threshold can not be calculated. If you choose more than the number of your sample replicates, all peptides are deleted.
Our software comes pre-filled out with suggested parameters that aim to get rid of most of the low-quality peptides. If you leave it empty or write 0, that filtering parameter is skipped. Choose the output format as DynamX for a single peptide list, or HDExaminer to have peptides from single pass and multi-pass experiments split.
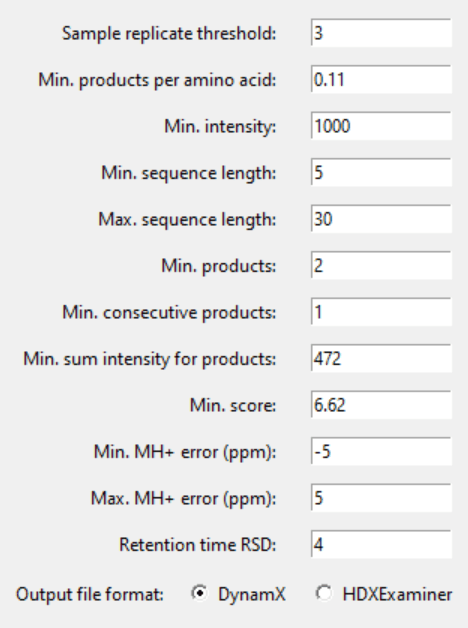
INFO: What do the filtering parameters mean?
See this publication by Sørensen and Salbo (2018) for why we chose the filtering parameters that our software comes pre-filled out with:
This is what they mean:
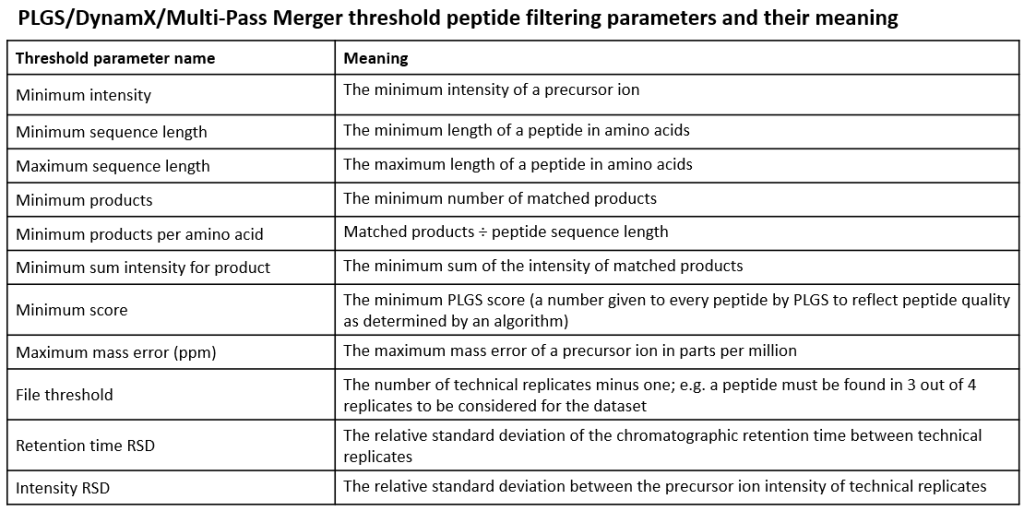
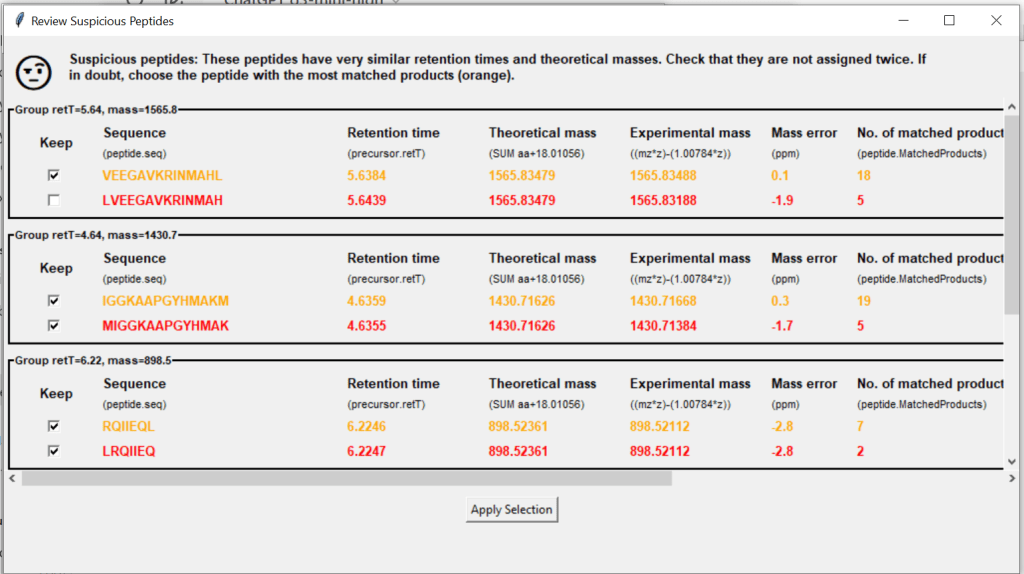
5.5. Click “Process Files” & exclude false IDs.
Click “Process Files”.
Before merging your files, this window will tell you if your data contains suspicious peptides – these are potential double identifications, where peptides share a very similar retention time and theoretical mass. You can choose to keep (tick) or exclude (untick) any of them.
Now, you files will be merged and filtered for each trendline. You can scroll down the interface to double check that it was done correctly…
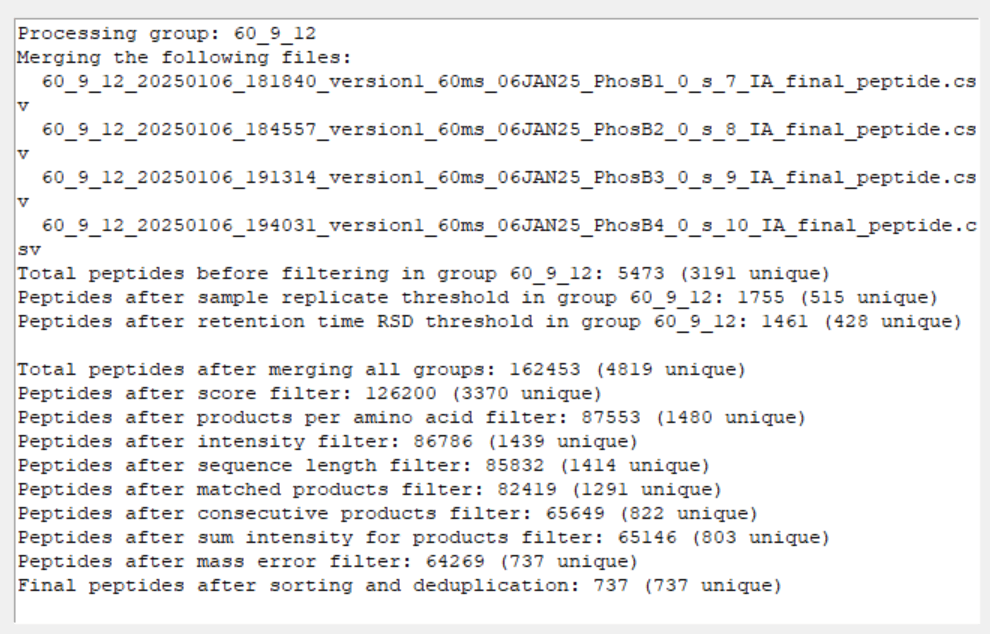
Find your finished .CSV file(s) containing the single best performing unique peptides across all of your datasets in the parent directory of your processing output folder. It is timestamped to prevent overwriting.
